
Let's see your finished DIY projects!
Moderator: Ghost Hip
Forum rules
The DIY forum is for personal projects (things that are not for sale, not in production), info sharing, peer to peer assistance. No backdoor spamming (DIY posts that are actually advertisements for your business). No clones of in-production pedals. If you have concerns or questions, feel free to PM admin. Thanks so much!
The DIY forum is for personal projects (things that are not for sale, not in production), info sharing, peer to peer assistance. No backdoor spamming (DIY posts that are actually advertisements for your business). No clones of in-production pedals. If you have concerns or questions, feel free to PM admin. Thanks so much!
-
iloophao
- uncommitted

- Posts: 2
- Joined: Mon Apr 20, 2009 7:13 am
-
Pirate

- committed

- Posts: 423
- Joined: Fri Jul 25, 2008 2:45 pm
- Location: Rochester,NY
- Contact:
Re: Let's see your finished DIY projects!
holy shit dude thats awesome
-
tio makeke

- involved

- Posts: 81
- Joined: Fri Feb 27, 2009 2:17 pm
Re: Let's see your finished DIY projects!
yellow submarine DS-1 Mod
- Attachments
-
stockholder of my own happiness
-
McSpunckle

- IAMILFFAMOUS

- Posts: 3848
- Joined: Mon Oct 06, 2008 10:20 am
- Location: Nashville, TN
Re: Let's see your finished DIY projects!

In progress...
-
McSpunckle
- IAMILFFAMOUS
- Posts: 3848
- Joined: Mon Oct 06, 2008 10:20 am
- Location: Nashville, TN
Re: Let's see your finished DIY projects!
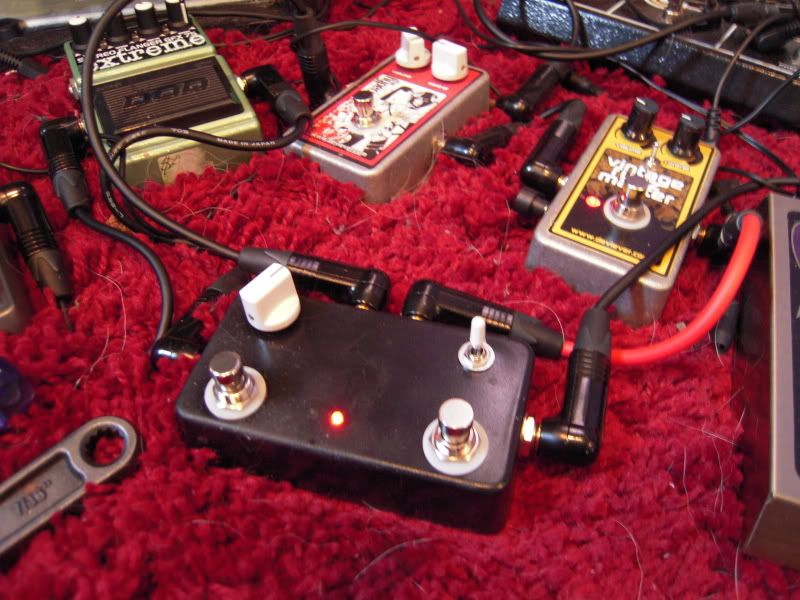
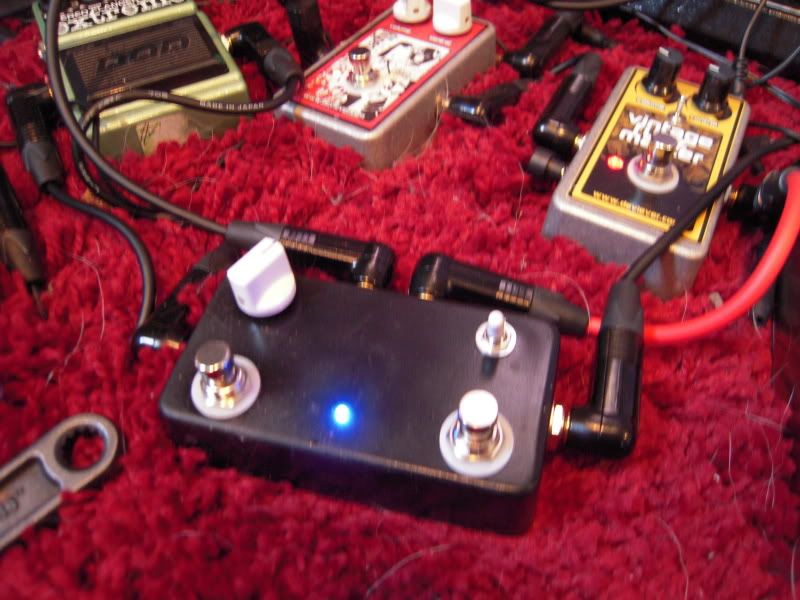
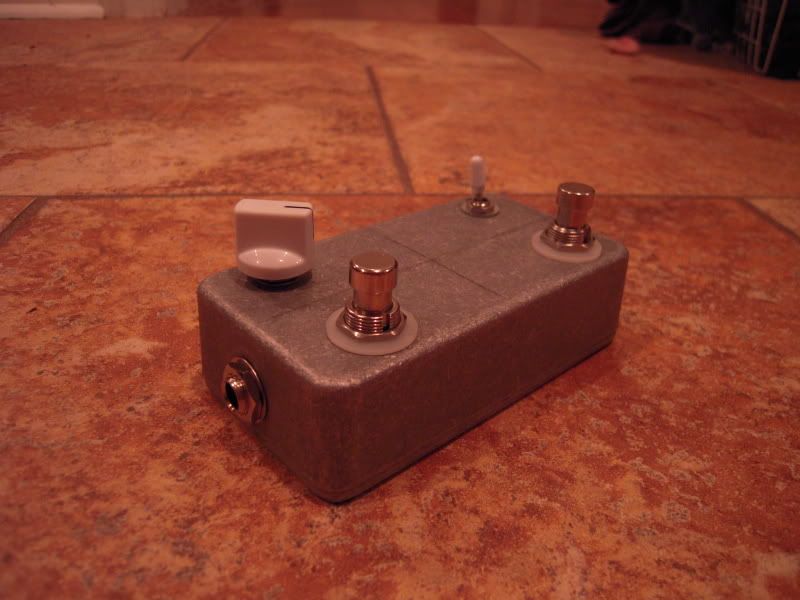
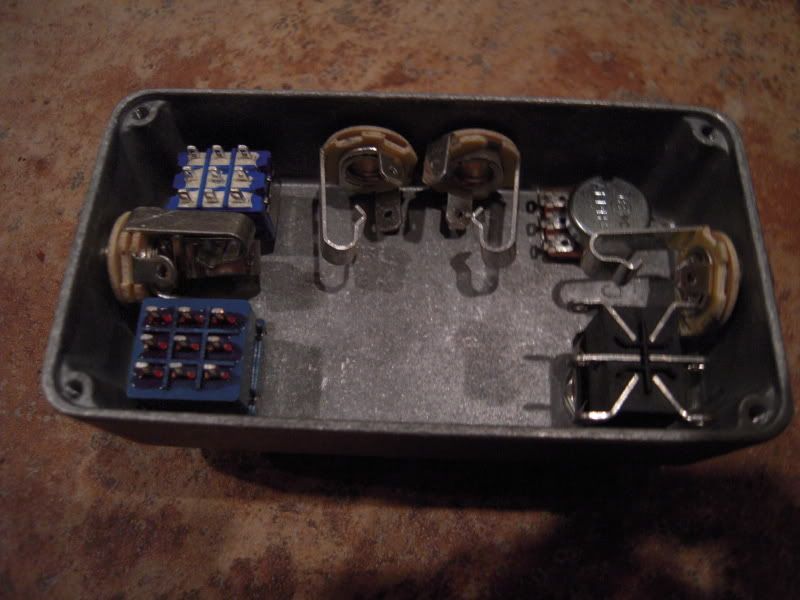
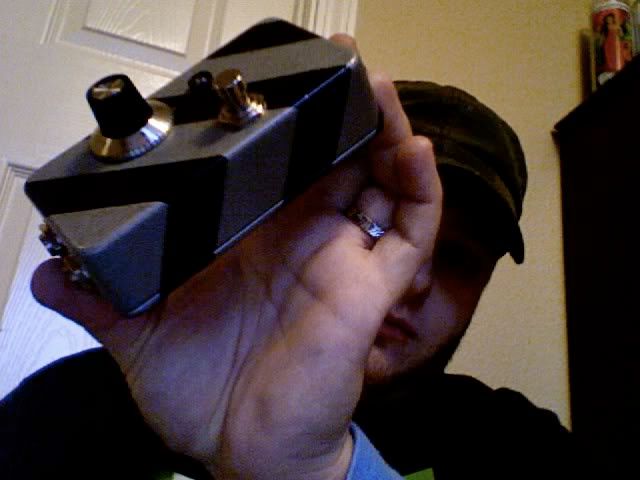
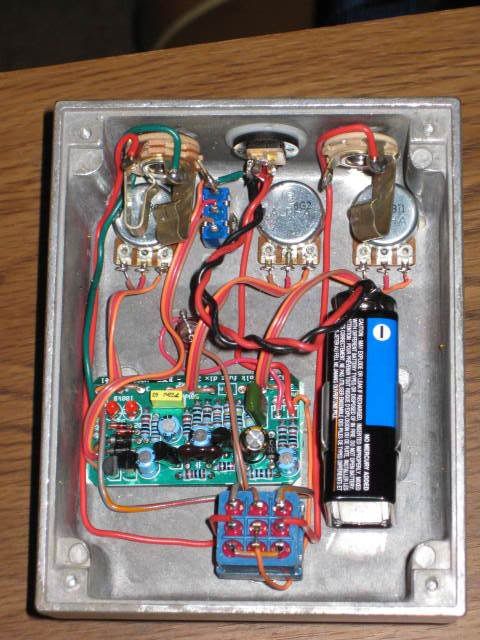
Finally got all the bugs out of it. Imma build another one, but without the little problems this one had.
It's a true bypass/feedback looper. With the switch up (red LED) it's a feedback looper. The knob is intensity of said loop. The left footswitch is momentary-- and turns off the feedback, making it just a true bypass loop temporarily.
With the switch down (blue LED) it works backwards... it's a true bypass loop, and the momentary switch makes it into a feedback loop.
The right foot switch is true bypass, naturally.
The battery placement is pretty bad... but it'll set perfectly between the switches if I move the LED (probably right next to the toggle switch). The battery only controls the LED. When the pedal is off, the battery isn't connected to anything... so no need for the stereo jack.
-
dannyc

- uncommitted
- Posts: 4
- Joined: Sun May 10, 2009 1:09 am
- Location: Stamford,England
Re: Let's see your finished DIY projects!
I've posted this elsewhere,but thought I'd put it here for better placement
It's a booster I designed that has the same amount of gain as an SHO but with a different circuit
You can make this,sell it,without any worries
There's enough gain from it to put a passive eq or diode clip on it ok,to turn it into an overdrive
Feel free!
The choice concerning resistors is if you want a little sharper response
Any npn silicon tranny will do,but the mpsa13 or any other npn darlington is best
It's called the 'Masterpush'
Gettit?
smokin'!
- Attachments
-
-
- booster wet(9v).mp3
- (629.39 KiB) Downloaded 627 times
-
- booster wet(12v).mp3
- (951.43 KiB) Downloaded 542 times
-
aen

- IAMILFFAMOUS
- Posts: 4363
- Joined: Sat May 19, 2007 10:34 pm
- Contact:
Re: Let's see your finished DIY projects!
McSpunkle-
Best Carpet EVER?
I think so.
Best Carpet EVER?
I think so.
Chankgeez wrote:
DWARFCRAFT: We are not fucking around this year.
-
FuzzHugger

- Admin

- Posts: 6108
- Joined: Mon May 19, 2008 2:05 pm
- Location: Pennsylvania
- Contact:
Re: Let's see your finished DIY projects!
aen wrote:McSpunkle-
Best Carpet EVER?
I think so.
*Checks...*
Yep.
-
McSpunckle
- IAMILFFAMOUS
- Posts: 3848
- Joined: Mon Oct 06, 2008 10:20 am
- Location: Nashville, TN
Re: Let's see your finished DIY projects!
Hehe. It's just the rug I use as my pedal board. 
-
Jay Fuji
Re: Let's see your finished DIY projects!
feedback looper i made for a friend, the finish matches his guitar case. the pot has a switch in the bottom to make it a regular TB box.
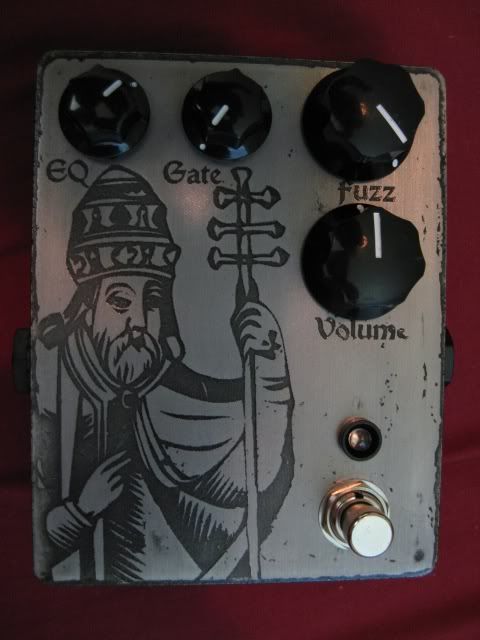
mammoth clone i just finished not too long ago for a guy on another forum. etched top, sides are a mix of truck bed liner, 4 colors of rattle can, and sanding grit thrown in between layers. both baked and heat gun'd to damn near flame.

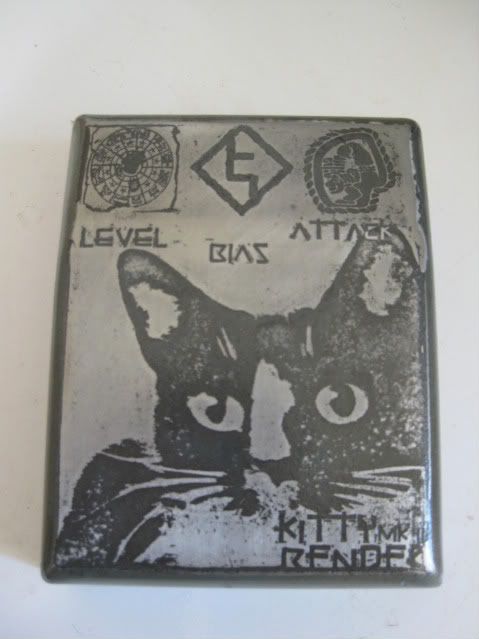
etched box for my good friend howard. his kitty maya is on there
") he is gonna stuff a BYOC tonebender in there.
he is gonna stuff a BYOC tonebender in there.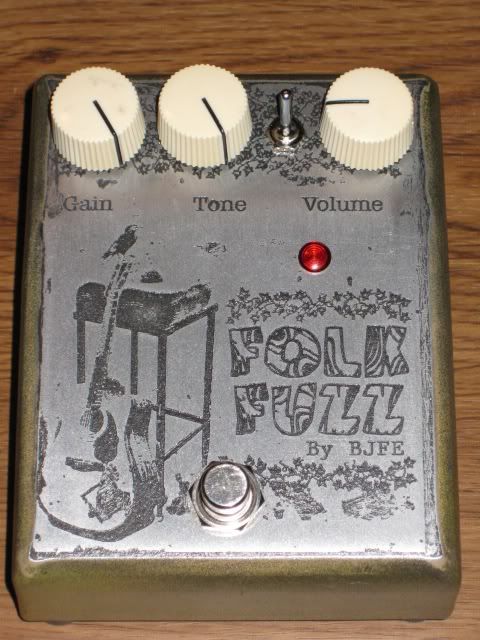
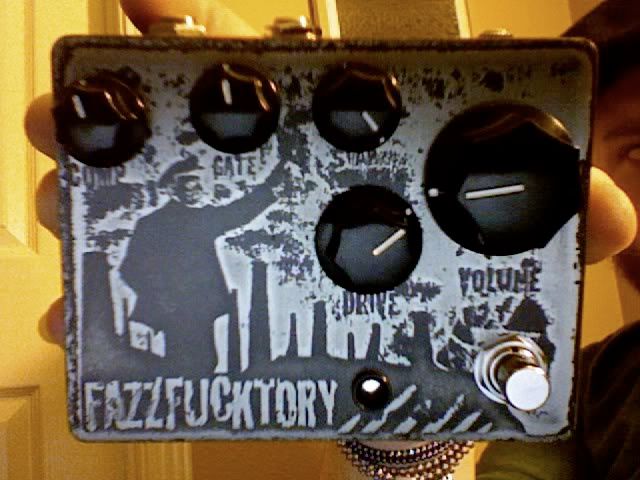
folk fuzz kit i built for my buddy steve in san antonio. top is etched, sides were painted in 12 layers, so i could buff off the edges and get sort of a very worn tweed look.
my first etch! it's still sitting here doing nothing yet. probably will end up some sort of something.
fuzz factory for my buddy ben in boston. SUPER high gain NOS transistors, this thing wails. i was sad to see it go cuz i like the graphic so much (i couldn't care less about the pedal, haha)
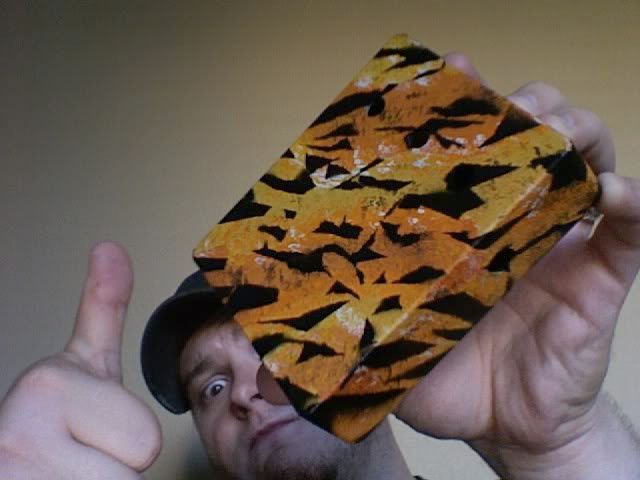
this was my first attempt at box finishing... i was kinda going for a street lookin' tiger paint, i think it turned out pretty sweet actually. i still haven't done anything with this.
-
sjtele

- experienced

- Posts: 500
- Joined: Tue Apr 21, 2009 12:17 pm
Re: Let's see your finished DIY projects!
Noice work! Love that raw look of the graphics. Must have taken some time, but it shows. 
-
theshoegazer

- FAMOUS

- Posts: 1147
- Joined: Wed Nov 26, 2008 8:14 pm
- Location: Fullerton, CA
Re: Let's see your finished DIY projects!
Awesome pedals. I've always wanted to etch my work but I can't seem to find any good tutorials online for etching. Any helpful links/videos etc?
-
Wizard

- FAMOUS
- Posts: 1579
- Joined: Tue Jun 02, 2009 1:50 am
- Location: Philadelphia, PA
- Contact:
Re: Let's see your finished DIY projects!
Yeah, those etches are amazing. The detail is wonderful.
I've got a fuzzbox and i'm not afraid to use it
jrmy wrote:And unlike the rest of the country, we recognize Sarcasm as a crucial building block of spoken language. Kind of like umami in cooking.
-
Jay Fuji
Re: Let's see your finished DIY projects!
i etch boxes the same way i etch circuit boards, with PnP blue. the only trick to getting a good etch is having a really flat top. i actually like all my stuff to look like it's been through a war, so i kinda half-assed want it to look rough. you can get great detail depending on the graphic and how picky you are about fine lines etc.
i remember seeing a thread at FSO or something about etching, but they didn't do it the way i do. i just paint the box, sand the top off, iron on the PnP, etch it in a very shallow bath of ferric,rinse it, then resand the PNP off. piece of cake.
i remember seeing a thread at FSO or something about etching, but they didn't do it the way i do. i just paint the box, sand the top off, iron on the PnP, etch it in a very shallow bath of ferric,rinse it, then resand the PNP off. piece of cake.
-
Wizard
- FAMOUS
- Posts: 1579
- Joined: Tue Jun 02, 2009 1:50 am
- Location: Philadelphia, PA
- Contact:
Re: Let's see your finished DIY projects!
Jay Fuji wrote:i just paint the box, sand the top off, iron on the PnP, etch it in a very shallow bath of ferric,rinse it, then resand the PNP off. piece of cake.
Okay, that seems pretty simple, so the ferric works on the paint the same way it would work on a copper board?
And by sanding the top off, what exactly does that mean

I'm a n00b, BUT i'm an interested n00b

I've got a fuzzbox and i'm not afraid to use it
jrmy wrote:And unlike the rest of the country, we recognize Sarcasm as a crucial building block of spoken language. Kind of like umami in cooking.